
403 Forbidden
ERR_WEB_NGX_403
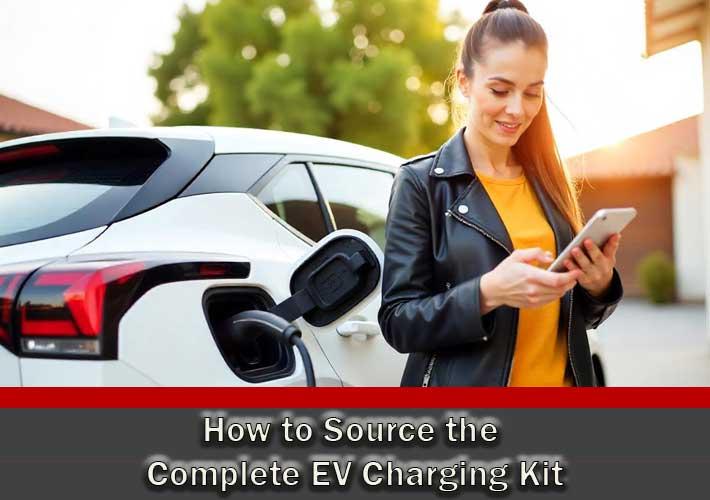
Thinking of installing an EV charger at home or for a customer? Don’t get caught out missing key components. Whether you're a homeowner planning your first electric vehicle installation, a professional electrician quoting a job, or an installer looking for a quick-reference guide, this article walks you through everything you need - from ground rods to smart chargers.
EV charging isn’t just about picking the right unit — it’s about ensuring your setup is safe, regulation-compliant, and future-ready. In the UK, that means selecting the correct earthing solution, RCD protection, cable sizing, and of course, a reliable charge point that meets Smart Charge Point Regulations.

We’ll break it down step-by-step with trusted product recommendations along the way — including FuseBox consumer units, Doncaster EV-Ultra cable, and the latest smart chargers from Aurora Seren and Rolec. Whether you're sourcing for a professional installation or DIY research, you’ll find everything you need in one place.
Let’s build your EV charging system the right way - starting with what goes into the ground.
The first step is establishing a proper earthing system for the EV charger, while your existing earthing provisions might be adequate you may want to consider upgrading. In UK installations, special attention is needed if the property has a PME (TN-C-S) supply. The 18th Edition Regulations (BS 7671) historically required that outdoor EV charge points not use the house PME (Protective Multiple Earthing) earth directly – instead, a separate TT earthing arrangement (earth rod) is used to mitigate the risk of an open PEN (Protective Earth and Neutral) fault. An open PEN fault on a PME supply can create dangerous touch voltages, so providing a local earth via a rod helps ensure any fault current safely dissipates into the ground.

Earthing kit components: Sourcing a complete earthing kit is essential. This typically includes an earth rod (electrode) driven into the ground, a clamp to connect the earthing conductor, and an inspection cover for safety. We recommend the following UK-standard components for an EV charger earthing kit:
| Earthing Component | Purpose in EV Installation |
|---|---|
| Unicrimp 5/8" Earth Rod, 1200 mm | Copper-bonded rod that provides a low-resistance path to earth (buried in the ground). A 1200mm rod offers a good length to achieve the necessary earth contact. |
| Unicrimp 5/8" Rod-to-Cable G-Clamp | Heavy-duty clamp that securely bonds the earthing conductor (usually a green/yellow 16mm² 6491X cable) to the earth rod. Ensures a reliable electrical connection that won’t loosen over time. |
| Unicrimp 100×100×50mm Earthing Inspection Box | Durable plastic pit/cover installed flush with the ground to house the top of the earth rod and clamp. It includes a safety label and allows easy testing of the rod’s earth resistance during maintenance. |
While their is a thinner earth rod size of 3/8" size, the cost difference is very negligible, opting for the bigger size seems like a more prudent purchase. There's a comprehensive article about earth rods here.
Using the above earthing kit, the installer will drive the rod into a convenient outdoor location (typically near the charger or along an external wall), attach the clamp and earth cable, and fit the inspection box over it. The other end of the earth cable connects to the charger’s earth terminal, forming a dedicated TT earth for the charger. This way, if a PEN fault occurs on the mains, the charger’s earth reference is maintained by the rod (or the charger will isolate if it has open PEN detection). Note that achieving a low enough earth resistance is important – aim for well under 200 Ω (many EVs may require <150 Ω to allow charging). The rod and connection should be tested with an earth tester to ensure compliance.
Pro Tip: Some modern EV chargers include built-in PEN fault detection that can automatically disconnect the supply if a neutral failure is detected, sometimes allowing installers to avoid using an earth rod. However, if your charger or local regulations still call for a separate earth electrode, the above kit provides a simple and cost-effective solution. You might also need to upgrade if you're installing a battery system.
Protective devices are the next critical part of the EV charging kit. EV chargers are high-current devices (commonly 32 A continuous for ~7 kW charging) and must be on a dedicated circuit with the correct circuit breaker and RCD (Residual Current Device) for safety. UK regulations (BS 7671 Section 722) require each EV charge point circuit to be protected by an RCD not exceeding 30mA, covering all live conductors (including neutral). This means using a double-pole RCD or RCBO (RCBO = combined MCB and RCD) for the charger supply, since single-pole devices that don’t break neutral are not acceptable.
Choosing the RCD Type: A critical detail for EV chargers is selecting the right Type of RCD. EV chargers can potentially leak smooth DC currents (for example, if there’s a fault in the vehicle’s on-board charger). A standard Type AC RCD is not suitable, because DC leakage above 6 mA can blind it (rendering it unable to trip). The industry standards (IEC 61851) mandate either:
Use a Type B RCD upstream – Type B RCDs can detect pure DC faults and will trip even if high DC current is present. These were traditionally required if an EV charger did not have any internal DC monitoring. However, Type B devices are relatively expensive. Type B RCD's are around five times more expensive than type A, so you want to avoid using one unless its completely necessary.
Or, use a charger with built-in RDC-DD (Residual Direct Current Detecting Device) of 6 mA, combined with a cheaper Type A RCD upstream. Most modern chargers (e.g. Rolec, Aurora Seren, Zappi, Pod Point) incorporate a 6mA DC leakage detector internally, which means you can use a Type A 30mA RCD for the supply. The charger’s RDC-DD will trip if DC leakage exceeds 6mA, protecting the external RCD. Type A RCDs are far more common and cost-effective, hence this configuration is preferred today. Always verify the charger’s manual – if it specifies an internal 6mA DC protection, a Type A RCD suffices; if not, opt for a Type B RCD or an all-in-one device such as a Type A RCBO.

Dedicated Consumer Unit: For a tidy and code-compliant installation, it’s recommended to use a dedicated consumer unit (distribution board) for the EV charger circuit, especially if the main house consumer unit has no spare ways or is not located near the charger supply route. FuseBox offers IP65-rated “Garage” consumer units for EV chargers that come with the appropriate RCD/MCB included. FuseBox also have a selection of internal rated EV boards which are IP20 rated and cost less.

For example, a FuseBox EV charger consumer unit is available with different incoming options, which are:
The integrated Surge Protection Device (SPD) is for transient overvoltage protection on the supply. If you're unsure about whether you need surge protection, read our dedicate article: To Surge or Not to Surge, that is the Question.
Recommended Unit: FuseBox IP65 Garage Consumer Unit (EV Charger Kit) – This comes pre-fitted with a 100A main switch and a 32A Type A RCBO, providing 30mA RCD protection and overcurrent protection in one device along with an SPD. Using a dedicated unit like this simplifies the installation – you can mount it adjacent to the supply meter or in the garage, feed it from the house supply via an appropriate submain, and have the EV charger as the sole circuit on it. It keeps the EV circuit isolated from the main house board, reducing the risk of nuisance tripping other circuits and easing future maintenance.
When installing the consumer unit, ensure the enclosure is suitably rated for the environment (IP65 is ideal for damp garages or outdoor areas). All connections (live, neutral, earth) from the main supply to this sub-board must be correctly rated. Typically, a 40A MCB in the main house board feeds the EV consumer unit, which then has the 32 A RCBO for the charger. Always double-check that neutral is not shared with other circuits and that the RCD in the EV unit covers line and neutral. FuseBox consumer units are known for being installer-friendly and cost-effective, making them a solid choice for this phase.
Safety Note: Installing an EV charger circuit is usually notifiable electrical work in the UK (Part P of building regs), so a certified electrician should either do the work or sign it off. The circuit protection phase is crucial for compliance – from ensuring the RCD type is correct to verifying disconnection times and earthing, all must meet BS 7671 requirements. It’s good practice to test the RCD/RCBO with an instrument to confirm 30mA trip at the required speed, and if using a Type A, also test that a 6mA DC fault doesn’t impair its operation (many testers have a DC ramp test for this).
Cabling forms the backbone of the EV charging kit, literally connecting the supply to the charger. Choosing the right cable type and size for a 7.4kW (32A) charger involves considering current capacity, voltage drop, installation method (surface clipped vs buried), cable length and regulatory requirements.
Design current: We use 32A as the design current for single-phase chargers (typical for Rolec Evo, Aurora Seren, Pod Point, etc., all around 7–7.4kW at 230 V). Unlike some household circuits, EV charging is a continuous heavy load (often drawing 32 A for several hours), so it’s wise to design with minimal voltage drop and heat rise.
Cable size (cross-sectional area): In many domestic installs, 6mm² copper cable is a common choice for a 32 A charger circuit, but this must be verified against the installation conditions:
For short runs (e.g. <=20 m) on a surface clipped route (cooling air around cable, reference method C), a 6 mm² cable typically has ampacity ~47A and will handle 32A continuously with ease. Voltage drop for 6mm² is around 7.3 mV/A/m, so over 20 metres at 32A the drop is ~4.7 V (just 2% of 230 V, well within the 5% limit). Even up to ~40 metres, 6mm² stays within allowable drop (~4–5%). Thus, for many home garages or driveways, 6mm² is sufficient.
For longer runs (approaching 40–50 metres or more), or if the cable is buried underground or runs through insulation (which reduces its current carrying capacity), you may need to step up to 10mm² to keep voltage drop and heating in check. A 10 mm² cable has a drop of ~4.4 mV/A/m, which at 32 A and 50 m gives ~7 V drop (~3%), and it has higher ampacity (in the 60–70A range depending on method) providing more headroom.
If running through walls, lofts, or trunking with other cables, consider derating factors. When in doubt, err on the side of a larger cable to maintain safety and efficiency (the charger will charge slightly faster and cooler with less volt drop on a thicker cable).
Cable type: It’s highly recommended to use steel wired armoured cable (SWA) for outdoor runs or any section that is buried or exposed to potential mechanical damage. A 3-core SWA (with one core as line, one as neutral, and one as CPC/earth or as a spare if using the armour as earth) is typical. For example, a 3 core 6mm² SWA cable would be a good standard choice for most single-phase installs; if calculations show the need, a 3 core 10mm² SWA can be used for very long or challenging runs.
Dedicated EV Cables

A more innovative option for EV wiring is the Doncaster Cables EV-Ultra® cable, which we recommend for its convenience. This cable combines power conductors and a data cable in one sheath. Specifically, it includes the required live, neutral, earth conductors (e.g. 6mm² copper cores for power) plus a twisted pair data cable (Cat5e) integrated alongside. The cable is double-sheathed (and available in armoured variants) to protect both power and data.
The advantage is that if your charger uses a current sensor (CT) or communications (e.g. load management, solar integration), you can run a single EV-Ultra cable from the consumer unit to the charger, and have the data/CT wires included, rather than running a separate data cable. This makes the installation faster, neater, and simpler for the installer and looks cleaner on the exterior of the house.
Recommended Cable: Doncaster Cables EV-Ultra Cable – Use 3 core 6mm² + 1 Cat5e as a starting point for a 32A charger. This will handle most home situations. Ensure you get the armoured version if the run is outdoors or underground (the armoured EV-Ultra has steel wire armor plus the internal Cat5e). The Cat5e pair can be used for connecting a CT clamp back to the charger (for load management or solar PV excess charging features) or for any future smart charger data needs. If a heavier gauge is needed (rarely, for very long runs), EV-Ultra also comes in 4mm², 10mm² and 16mm² sizes as well as 3 phase versions.
Fixings and routing: Install the cable with respect for regulations and neatness. For surface mounting (on walls, fences, etc.), use appropriate cable cleats or clips at regular intervals. Fire safety regulations now require that cables are supported in a way that prevents them from collapsing in a fire (plastic clips alone are not allowed as sole support). A good solution is to use fire-rated metal cable clips for any sections along walls or structures. We suggest using LINIAN Superclips which are the most popular choice for electrical installers:
LINIAN Super Fire Clips (for conduit & armoured cables) – These steel one-piece clips can secure SWA or grouped cables firmly, and they won’t melt in high heat. They comply with BS 7671 requirements for preventing premature collapse of wiring. Place clips at recommended intervals (e.g. ~300mm apart for horizontal runs, ~400mm for vertical) or as per manufacturer guidance, to support the cable weight.
| EV-Ultra® Product Code | Cable Type | Approx. Overall Diameter | LINIAN Product Description | Cleat Size | Pack Qty | Product Code |
|---|---|---|---|---|---|---|
| EV-ULTRA3C4.0 | 3 Core 4mm Tuff Sheath | 13.6mm | SuperClip Size 12-14mm | Size 6 | 25 | 1LSB1214 |
| EV-ULTRA3C4.0CAT5 | 3 Core 4mm CAT5 Tuff Sheath | 14.8mm | SuperClip Size 15-18mm | Size 6 | 25 | 1LSB1518 |
| EV-ULTRA3C4.0SWA | 3 Core 4mm SWA | 15.0mm | SuperClip Size 15-18mm | Size 6 | 25 | 1LSB1518 |
| EV-ULTRA3C4.0CAT5SWA | 3 Core 4mm CAT5 & SWA | 16.5mm | SuperClip Size 15-18mm | Size 7 | 25 | 1LSB1518 |
| EV-ULTRA3C6.0 | 3 Core 6mm Tuff Sheath | 14.4mm | SuperClip Size 12-14mm | Size 6 | 25 | 1LSB1214 |
| EV-ULTRA3C6.0CAT5 | 3 Core 6mm CAT5 Tuff Sheath | 16.0mm | SuperClip Size 15-18mm | Size 7 | 25 | 1LSB1518 |
| EV-ULTRA3C6.0SWA | 3 Core 6mm SWA | 16.8mm | SuperClip Size 15-18mm | Size 7 | 25 | 1LSB1518 |
| EV-ULTRA3C6.0CAT5SWA | 3 Core 6mm CAT5 & SWA | 18.6mm | SuperClip Size 18-20mm | Size 7 | 25 | 1LSB1820 |
For buried cables, ensure a suitable trench depth (commonly 450mm or more in domestic gardens), and consider running the cable in a conduit or duct for extra protection and easy replacement in future. Mark the route with warning tape above the cable in the trench. If using SWA, properly terminate the armouring with cable glands into metal enclosures (or use plastic gland plus banjo for earthing the armor if required). The armor should be earthed at least on the supply end for safety, even if you run a separate CPC (Circuit Protective Conductor) core.
At this stage, after cable laying, the continuity and insulation resistance of the cable are tested, and the installer will connect one end to the consumer unit (through the 32A RCBO) and leave the other end ready to wire into the charger unit in Phase 4.
With the supporting infrastructure (earthing, protection, and cable) in place, the final component is the EV charge point unit itself. This is the device that actually interfaces with the vehicle – typically wall-mounted, containing the electronics to control charging, with either a tethered cable or a socket for the user’s cable.

When sourcing an EV charger unit, consider the power rating (7.4kW for single-phase 32A), features, compliance, and brand reliability. Below we recommend two feature-rich UK models and also mention other popular options:
Aurora Seren EV Charging Point – Smart, lockable, and robust unit (Type 2 socket). The Aurora Seren is a relatively new entrant with strong specs: 7.4kW output, smart scheduling via a dedicated app, Wi-Fi/Ethernet connectivity, and compliance with the UK Smart Charge Point Regulations 2021. It’s built for durability with IP55 weatherproofing and IK10 impact resistance meaning it can withstand outdoor conditions and mechanical knocks.

Importantly, it has integrated 30mA Type A RCD protection and 6 mA DC leakage detection, plus even PEN fault (open PEN) detection built-in. This means safety is largely self-contained – the Seren will trip internally for DC faults or PEN faults, adding a layer of protection. It also features a key-lock for security (to prevent unauthorized use) and comes with different cover color options to suit the homeowner’s preference. The unit is OZEV grant-approved (as of writing) and includes a 3-year warranty.
It comes with a polar white cover as standard but additional coloured covers can be ordered separately. Colours include: Sky Blue, Aqua, Stealth Black, Strom Blue, Deep Coral or Midnight Grey which is shown below:

Rolec EVO 7.4 kW Intelligent EV Charger – Smart charger with PME protection and solar-ready features. The Rolec EVO is a smart home charger from Rolec (a well-known UK EV charger manufacturer) that delivers 7.4kW (32A) single-phase charging. It is engineered for easy installation (the case offers quick internal access) and comes loaded with safety features. Notably, the EVO model includes integrated PEN fault detection, meaning “no earth rod required” in its standard install, and it has internal 30mA Type A RCD and 6mA DC fault protection as well – covering the regulation requirements.

The unit is rated IP54 and IK10 for outdoor durability, similar to Seren. On the smart side, it is OCPP 1.6 compliant and has a companion mobile app for control, with features like scheduled/off-peak charging and solar PV surplus charging support It even includes dynamic load balancing capability (a CT clamp and cable are provided to moderate charging current based on house load). Rolec EVO comes with 5-year warranty and is OZEV grant eligible. Recommended link: Rolec EVO 7.4kW Intelligent EV Charging Unit (refer to its data sheet for full technical specs). According to the data sheet, the Rolec EVO is fully BS 7671:2018 A2:2022 compliant and even has smart security features to prevent tampering.

Both of the above chargers provide a “all-in-one” solution with the necessary electrical protection built-in, which complements the external protection we installed in earlier phases (it never hurts to have redundancy when it comes to safety). They each have slightly different apps and interfaces, but both will charge any Type 2 compatible EV.
Alternative popular chargers: In addition to Aurora and Rolec, the UK market offers other reputable models. MyEnergi’s Zappi charger is well-known for its seamless solar PV integration when combined with the Eddi– it can use surplus solar generation to charge your car and has features like eco modes. Pod Point is another widely used home charger brand, favored for its reliability and the backing of a large public charging network for app functionality. Both Zappi and Pod Point models are 7.4kW units with smart capabilities; Pod Point is often chosen via dealership programs, and Zappi is a favorite for tech-savvy homeowners with solar panels.
When sourcing your charger, ensure it’s a fully certified UK model with PEN fault protection (either built-in or achieved via an earth rod or add-on device) and that it includes (or comes with) a Type 2 connector that matches your vehicle. Most modern chargers, including those mentioned, are untethered (socket-only) or come with a tethered Type 2 cable – choose based on whether you prefer to keep a cable attached or use your own.
Installation: Mount the charger on a suitable exterior wall or post at a convenient height (typically ~1.2 m from ground to connector for easy access). Follow the manufacturer’s template for drilling and use appropriate wall anchors. Once fixed, feed in the supply cable from Phase 3.
Terminate the live, neutral, and earth conductors into the charger’s connection terminals as per its manual. If using a CT clamp for load management (e.g., Rolec EVO’s dynamic load balancing), install the clamp around the house’s incoming live or the designated circuit as instructed and connect its wires (often to the charger’s data/CT terminals – the EV-Ultra cable’s Cat5e pair would come in handy here).
Secure all glands and seals to maintain the IP rating of the unit. After wiring, test the charger: perform RCD trip tests, verify that the charger powers on and enters ready state, and if possible, plug in an EV or test unit to ensure it starts charging correctly. The charger’s integrated protections (RCD, PEN sensor) should also be tested – many units have built-in test functions for installers.
Finally, tidy up: label the consumer unit and mains board appropriately (“EV Charger” circuit), attach any warning labels (e.g. “Chargers on TT supply – do not disconnect earth” if applicable, or stickers indicating the presence of dual supplies if you added any) as required by regulations or the manufacturer.
Sourcing a complete EV charging kit involves gathering all the necessary components and understanding how they fit into the installation process. By following the above phases, you ensure no aspect is overlooked:
Earthing: Establish a dedicated safe earth for the charger (often via an earth rod) to protect against supply faults.
Circuit Protection: Use a proper RCD (typically Type A 30mA with 6mA DC tolerance) and a robust consumer unit (like FuseBox IP65 EV Boards) to house the protective devices.
Cabling: Size your cable for 32A continuous, usually 6mm² or 10mm² depending on run, and consider EV-Ultra cable for convenience. Secure cables with fire-safe fixings to meet the latest safety standards.
EV Charger Unit: Choose a quality charger (Aurora, Rolec, Zappi, Pod Point, etc.) with built-in protection and smart features that suit your needs. Ensure it’s installed to manufacturer guidelines and UK regulations. Consider which App you prefer and the overall costs of each unit. An EV charger is basically a socket on a wall that charges your car but you want to invest in a good quality product with a respectable guarantee period from a reputable brand.
Each component of the kit is critical for a safe, efficient, and compliant EV charging setup. By selecting the right products (as recommended) and following a structured approach, homeowners and electricians can confidently install an EV charger that will serve for years to come. Always double-check the latest UK regulations and manufacturer instructions, and when in doubt, consult a certified electrician. With the complete kit in hand, you’re well on your way to powering your electric vehicle at home, safely and reliably.


